Рендеринг шаблонов NativeScript Angular и компонентов в изображения

Работая над приложением NativeScript Angular с миллионами загрузок на разных платформах, можно столкнуться с непростой проблемой: нам нужно было сгенерировать изображение, которым пользователь мог бы поделиться. Обычно это можно сделать довольно легко, если вы видите это представление в своем приложении, где вы можете просто отобразить его в изображение (на самом деле это было сделано до https://www.npmjs.com/package/nativescript-cscreenshot). Сложность здесь заключалась в том, что это представление нигде не отображалось в приложении и даже имело специальные ограничения макета.
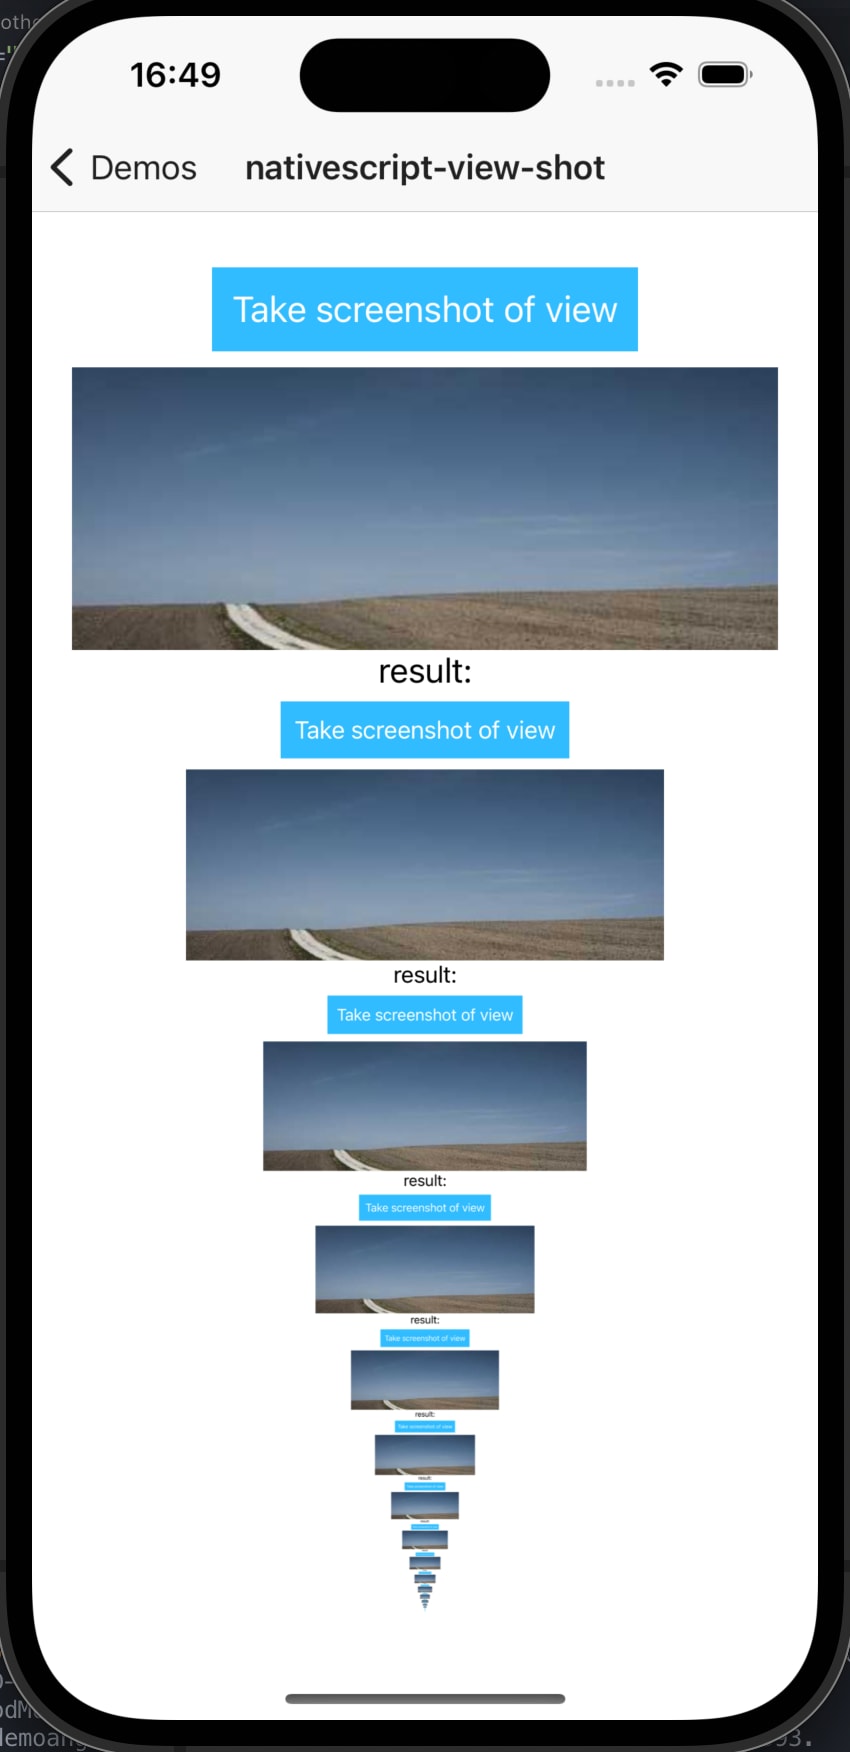
Создание скриншота просмотра
Сделать скриншот вида - несложная задача.
На Android это простой случай создания растрового изображения, прикрепления его к холсту, а затем рисования вида непосредственно на этом холсте:
export function renderToImageSource(hostView: View): ImageSource {
 const bitmap = android.graphics.Bitmap.createBitmap(hostView.android.getWidth(), hostView.android.getHeight(), android.graphics.Bitmap.Config.ARGB_8888);
 const canvas = new android.graphics.Canvas(bitmap);
 // ensure we start with a blank transparent canvas
 canvas.drawARGB(0, 0, 0, 0);
 hostView.android.draw(canvas);
 return new ImageSource(bitmap);
}
На стороне iOS у нас есть очень похожая концепция. Мы начинаем с контекста изображения, а затем визуализируем представление в этом контексте:
export function renderToImageSource(hostView: View): ImageSource {
 UIGraphicsBeginImageContextWithOptions(CGSizeMake(hostView.ios.frame.size.width, hostView.ios.frame.size.height), false, Screen.mainScreen.scale);
 (hostView.ios as UIView).layer.renderInContext(UIGraphicsGetCurrentContext());
 const image = UIGraphicsGetImageFromCurrentImageContext();
 UIGraphicsEndImageContext();
 return new ImageSource(image);
}
Создание скриншота любого представления NativeScript с помощью пары строк кода!
Визуализация представления, отделенного от иерархии представлений
Теперь давайте сделаем еще один шаг вперед. Давайте воспользуемся какой-нибудь хитроумной магией NativeScript и создадим наш макет, полностью отделенный от собственного дерева представлений:
export function loadViewInBackground(view: View): void {
 // get the context (android only)
 const context = isAndroid ? Utils.android.getApplicationContext() : {};
 // now create the native view and setup the styles (CSS) as if it were a root view
 view._setupAsRootView(context);
 // load the view to apply all the native properties
 view.callLoaded();
}
Это должно сработать! Теперь давайте просто вызовем эту функцию
Этот вид не имеет размера! Поэтому нам нужно измерить и разметить его. Это достаточно просто:
export function measureAndLayout(hostView: View, width?: number, height?: number) {
const dpWidth = width ? Utils.layout.toDevicePixels(width) : 0;
const dpHeight = height ? Utils.layout.toDevicePixels(height) : 0;
const infinity = Utils.layout.makeMeasureSpec(0, Utils.layout.UNSPECIFIED);
hostView.measure(width ? Utils.layout.makeMeasureSpec(dpWidth, Utils.layout.EXACTLY) : infinity, height ? Utils.layout.makeMeasureSpec(dpHeight, Utils.layout.EXACTLY) : infinity);
hostView.layout(0, 0, hostView.getMeasuredWidth(), hostView.getMeasuredHeight());
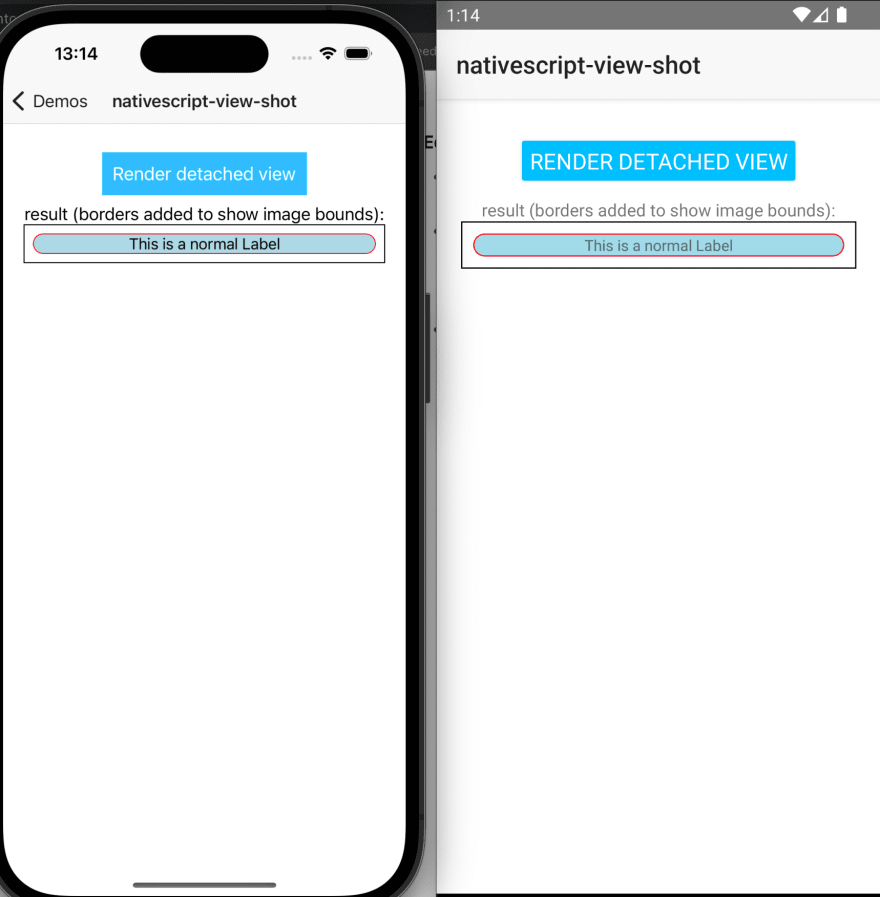
}Теперь этот вид должен отображаться точно по ширине и высоте, которые нам требуются. Давайте попробуем:
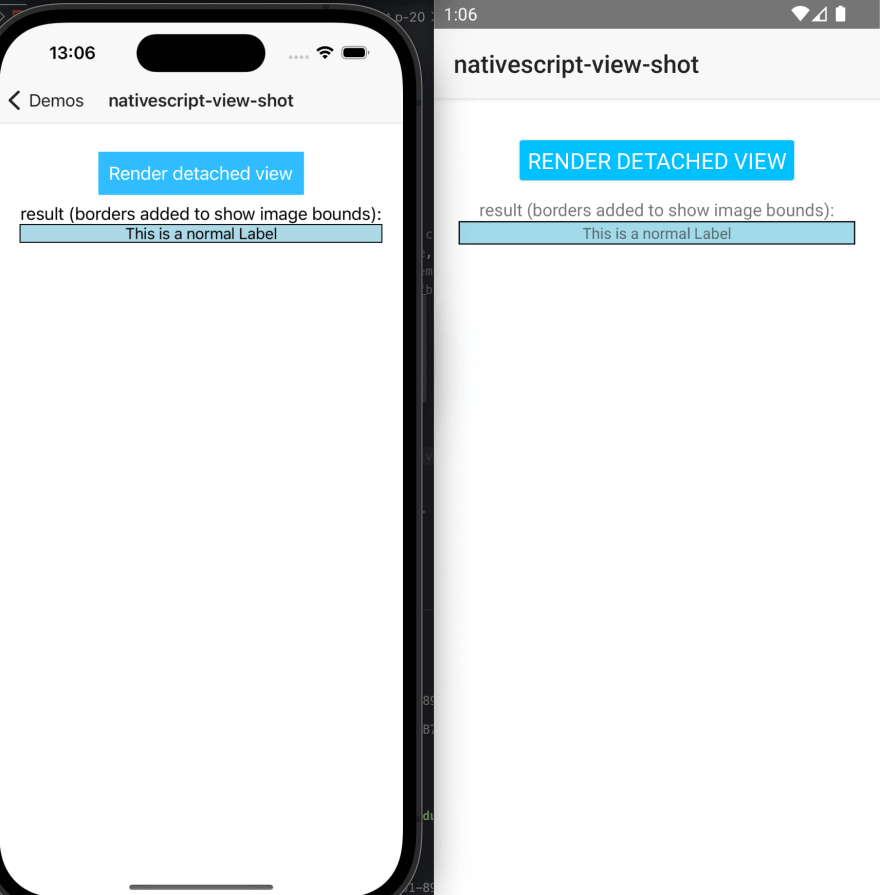
И это сработало! Оказывается, это было не так сложно, как мы думали. Теперь, когда мы готовы к работе, давайте добавим стиль. Давайте сохраним текст без изменений, но добавим немного стиля. Нам нужен некоторый радиус границы и некоторые поля.
.view-shot {
  border-radius: 50%;
  border-width: 1;
  border-color: red;
  margin: 10;
}
Теперь запустите это через наш рендеринг
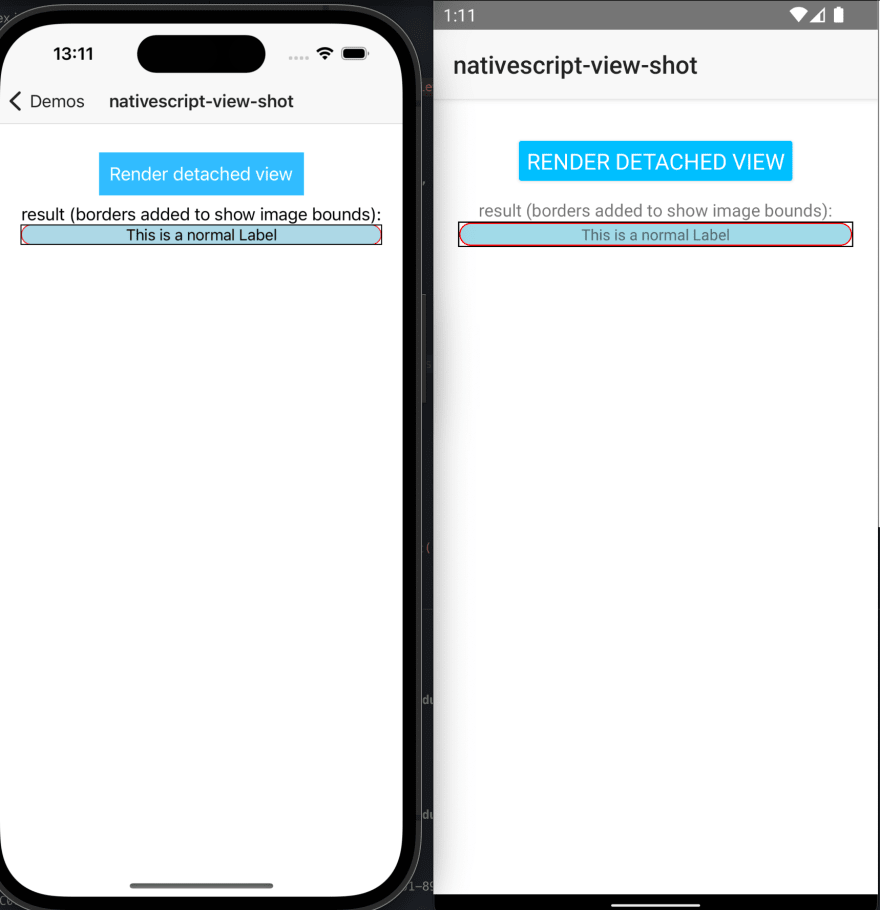
Куда делась наша маржа? Что ж, оказывается, что на обеих платформах родительский макет отвечает за позиционирование дочерних элементов, а поля - это просто некоторая дополнительная информация о позиционировании, предоставляемая родительскому элементу. Тогда еще одно быстрое решение: просто оберните вид другим макетом:
export function loadViewInBackground(view: View): View {
 // get the context (android only)
 const context = isAndroid ? Utils.android.getApplicationContext() : {};
 // create a host view to ensure we're preserving margins
 const hostView = new GridLayout();
 hostView.addChild(view);
 // now create the native view and setup the styles (CSS) as if it were a root view
 hostView._setupAsRootView(context);
 // load the view to apply all the native properties
 hostView.callLoaded();
 return hostView;
}
И результат:
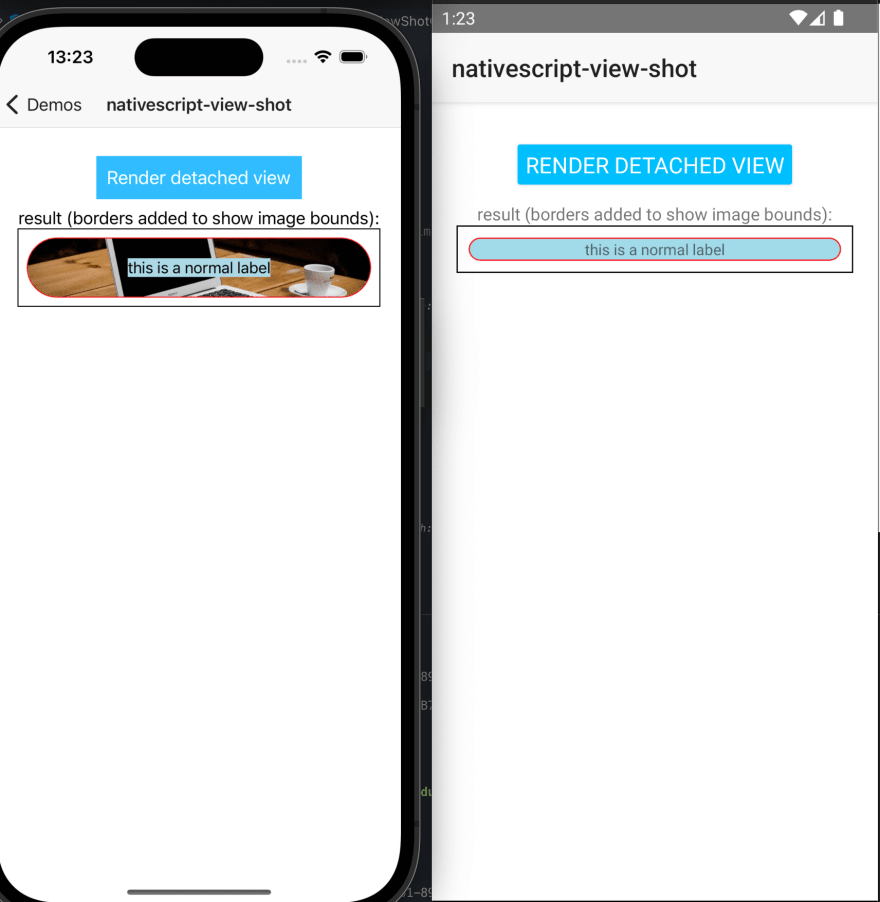
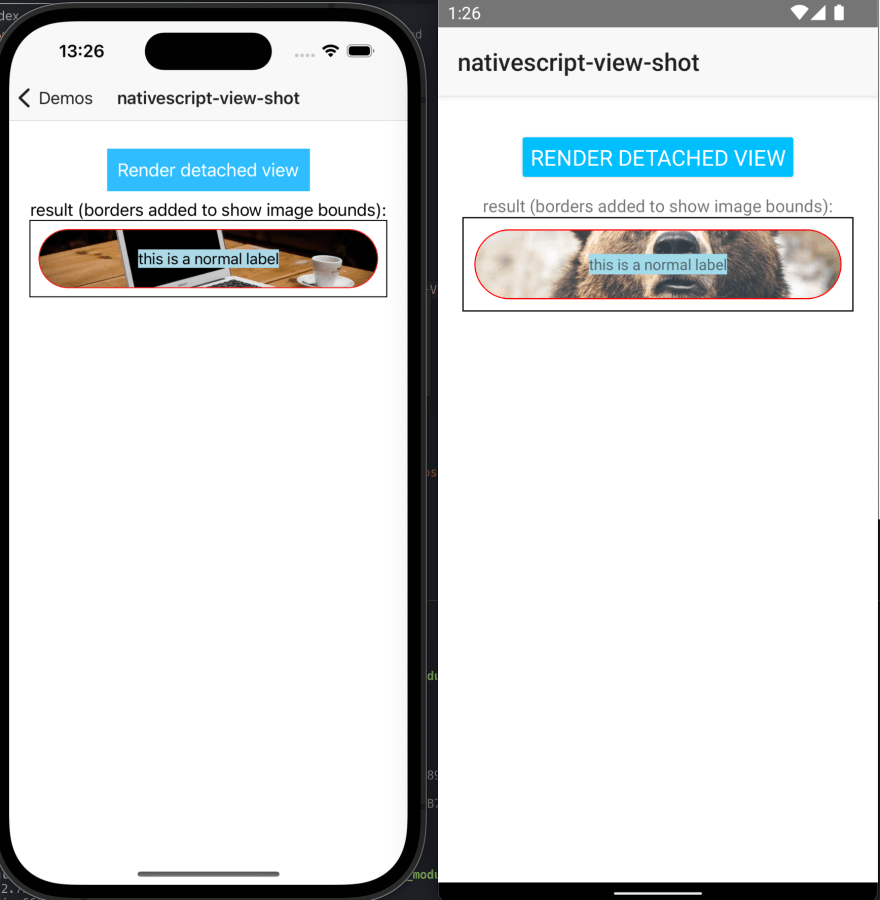
Теперь мы можем продолжать добавлять оставшуюся часть, например изображение. Изображение должно быть загружено, поэтому давайте добавим задержку между созданием вида и его скриншотом (мы можем кэшировать его позже).
Присоединение представления к иерархии представлений
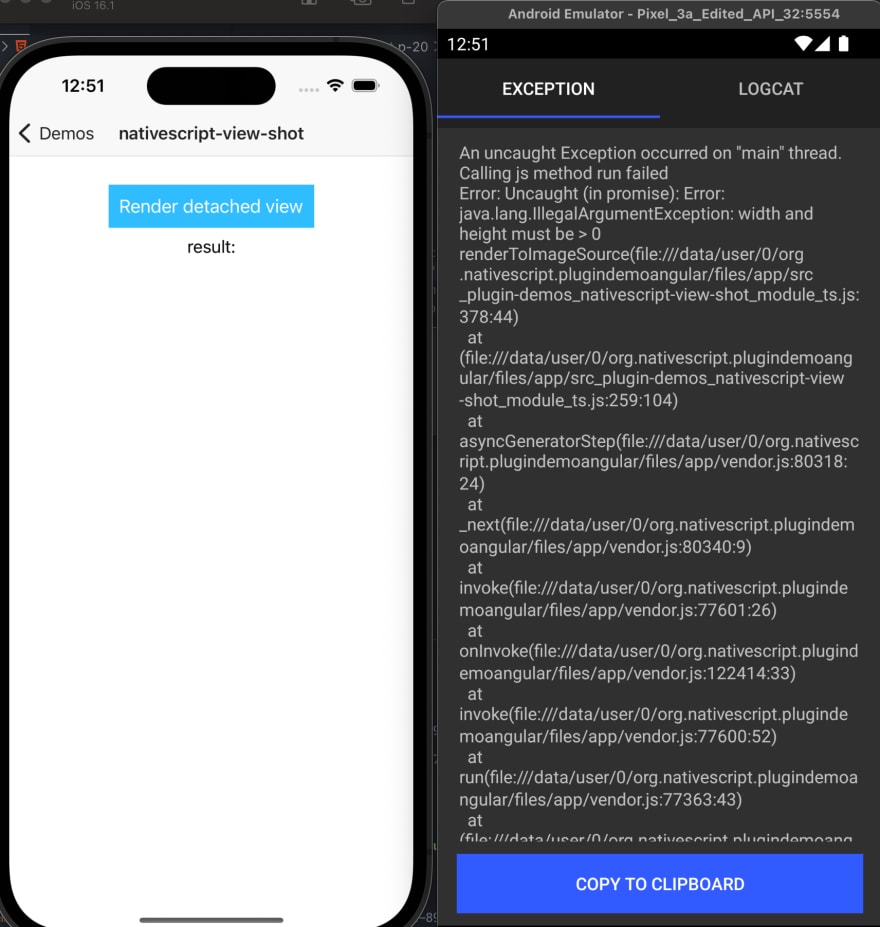
Покопавшись в собственном исходном коде, мы поняли, что на Android многие представления (например, изображение) будут полностью отображаться только тогда, когда они прикреплены к окну, так как же мы можем прикрепить их к иерархии представлений, не показывая их и вообще не влияя на макет?
Основная функция ViewGroup заключается в компоновке представлений определенным образом. Итак, сначала давайте создадим представление, которое не будет выполнять никакого макета:
@NativeClass
class DummyViewGroup extends android.view.ViewGroup {
 constructor(context: android.content.Context) {
   super(context);
   return global.__native(this);
 }
 public onMeasure(): void {
   this.setMeasuredDimension(0, 0);
 }
 public onLayout(): void {
   //
 }
}
class ContentViewDummy extends ContentView {
 createNativeView() {
   return new DummyViewGroup(this._context);
 }
}
Теперь нам просто нужно убедиться, что для его видимости установлено значение collapse, и использовать очень удобный метод из AppCompatActivity (addContentView), чтобы добавить представление в корень activity, по сути, добавив его в окно, но полностью невидимым.
export function loadViewInBackground(view: View) {
 const hiddenHost = new ContentViewDummy();
 const hostView = new GridLayout(); // use a host view to ensure margins are respected
 hiddenHost.content = hostView;
 hiddenHost.visibility = 'collapse';
 hostView.addChild(view);
 hiddenHost._setupAsRootView(Utils.android.getApplicationContext());
 hiddenHost.callLoaded();

 Application.android.startActivity.addContentView(hiddenHost.android, new android.view.ViewGroup.LayoutParams(0, 0));

 return {
   hiddenHost,
   hostView
 };
}
Интегрирование с Angular
До сих пор мы имели дело только с представлениями NativeScript, но что нас действительно волнует, так это то, как мы генерируем эти представления из компонентов и шаблонов Angular. Итак, вот как:
import { ComponentRef, inject, Injectable, Injector, TemplateRef, Type, ViewContainerRef } from '@angular/core';

import { generateNativeScriptView, isDetachedElement, isInvisibleNode, NgView, NgViewRef } from '@nativescript/angular';
import { ContentView, ImageSource, View, ViewBase } from '@nativescript/core';
import { disposeBackgroundView, loadViewInBackground, measureAndLayout, renderToImageSource } from '@valor/nativescript-view-shot';

export interface DrawableOptions<T = unknown> {
  /**
   * target width of the view and image, in dip. If not specified, the measured width of the view will be used.
   */
  width?: number;
  /**
   * target height of the view and image, in dip. If not specified, the measured height of the view will be used.
   */
  height?: number;
  /**
   * how much should we delay the rendering of the view into the image.
   * This is useful if you want to wait for an image to load before rendering the view.
   * If using a function, it will be called with the NgViewRef as the first argument.
   * The NgViewRef can be used to get the EmbeddedViewRef/ComponentRef and the NativeScript views.
   * This is useful as you can fire an event in your views when the view is ready, and then complete
   * the promise to finish rendering to image.
   */
  delay?: number | ((viewRef: NgViewRef<T>) => Promise<void>);
  /**
   * The logical host of the view. This is used to specify where in the DOM this view should lie.
   * The practical use of this is if you want the view to inherit CSS styles from a parent.
   * If this is not specified, the view will be handled as a root view,
   * meaning no ancestor styles will be applied, similar to dropping the view in app.component.html
   */
  logicalHost?: ViewBase | ViewContainerRef;
}

@Injectable({
  providedIn: 'root',
})
export class ViewShotService {
  private myInjector = inject(Injector);
  async captureInBackground<T>(type: Type<T> | TemplateRef<T>, { width, height, delay, logicalHost }: DrawableOptions<T> = {}): Promise<ImageSource> {
    // use @nativescript/angular helper to create a view
    const ngView = generateNativeScriptView(type, {
      injector: logicalHost instanceof ViewContainerRef ? logicalHost.injector : this.myInjector),
      keepNativeViewAttached: true,
    });
    // detect changes on the component
    if (ngView.ref instanceof ComponentRef) {
      ngView.ref.changeDetectorRef.detectChanges();
    } else {
      ngView.ref.detectChanges();
    }
    // currently generateNativeScriptView will generate the view wrapped in a ContentView
    // this is a minor bug that should be fixed in a future version on @nativescript/angular
    // so let's add a failsafe here to remove the parent if it exists
    if (ngView.view.parent) {
      if (ngView.view.parent instanceof ContentView) {
        ngView.view.parent.content = null;
      } else {
        ngView.view.parent._removeView(ngView.view);
      }
    }
    // use the method that loads a view in the background
    const drawableViews = loadViewInBackground(ngView.view, host);
    const { hostView } = drawableViews;

    // do the measuring of the hostView
    measureAndLayout(hostView, width, height);

    // this delay is either a function or time in ms
    // which is useful for letting async views load or animate
    if (typeof delay === 'function' || (typeof delay === 'number' && delay >= 0)) {
      if (typeof delay === 'number') {
        await new Promise<void>((resolve) =>
          setTimeout(() => {
            resolve();
          }, delay)
        );
      } else {
        await delay(ngView);
        if (ngView.ref instanceof ComponentRef) {
          ngView.ref.changeDetectorRef.detectChanges();
        } else {
          ngView.ref.detectChanges();
        }
      }
      // do a final measure after the last changes
      measureAndLayout(hostView, width, height);
    }

    // call the render function
    const result = renderToImageSource(hostView);

    // dispose views and component
    disposeBackgroundView(drawableViews);
    ngView.ref.destroy();
    return result;
  }

  // unchanged from the original implementation
  captureRenderedView(view: View) {
    return renderToImageSource(view);
  }
}
Заключение
Надеюсь, это дало вам представление о том, как собственные платформы отображают свои представления и как NativeScript можно использовать в расширенном составлении иерархии представлений.
Плагин NativeScript был выпущен как @valor/nativescript-view-shot, и вы можете проверить его исходный код в нашей общей рабочей области плагина.
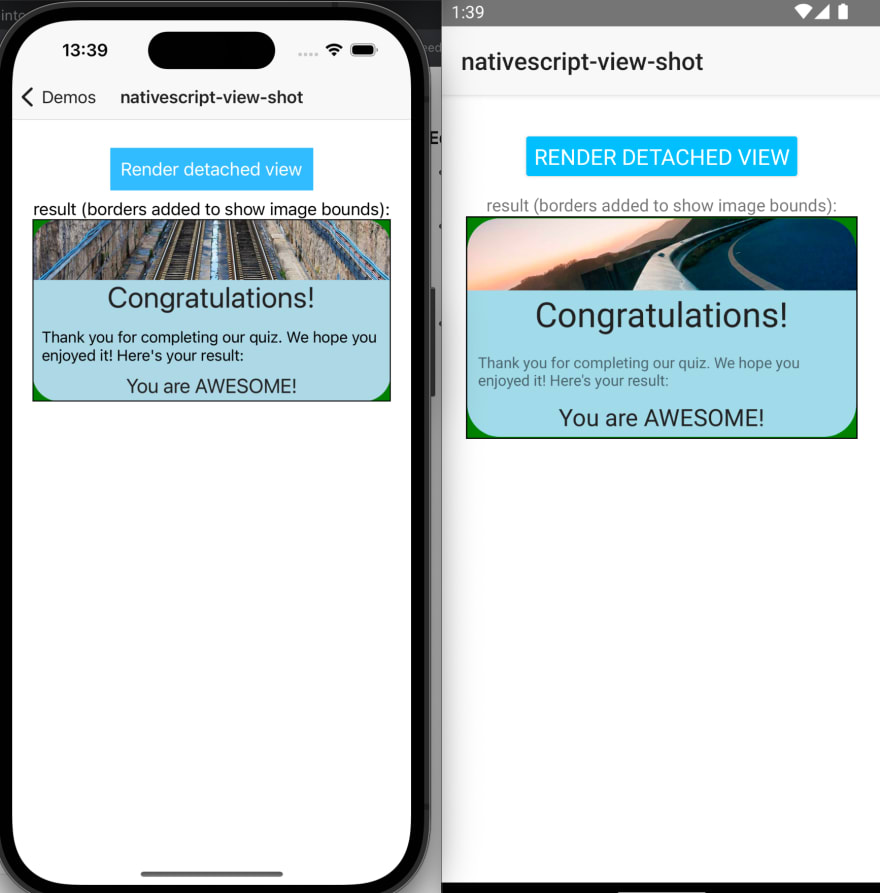
Теперь вы можете наслаждаться созданием представлений в фоновом режиме для показа, сохранения или обмена ими в социальных сетях, например, на следующем макете:
Valor, официальный партнер по профессиональной поддержке NativeScript, активно вносит свой вклад в экосистему NativeScript, обеспечивая корпоративную поддержку, консультации и расширение команды. Программное обеспечение Valor дополнительно помогает во всех аспектах SDLC, Интернета, серверной части и мобильных устройств.